
DIY: Christmas Ornament

I can remember the times when we decorate our classrooms when I was in high school for the coming classroom visitation wherein different sections have to make their classrooms feel the Christmas in it and the cleanest and the most Christmas-ful classroom will be the winner. And I’m proud to say that in my last three years in high school, we won places. So, what’s with us? Instead of buying decorations, we make them ourselves.
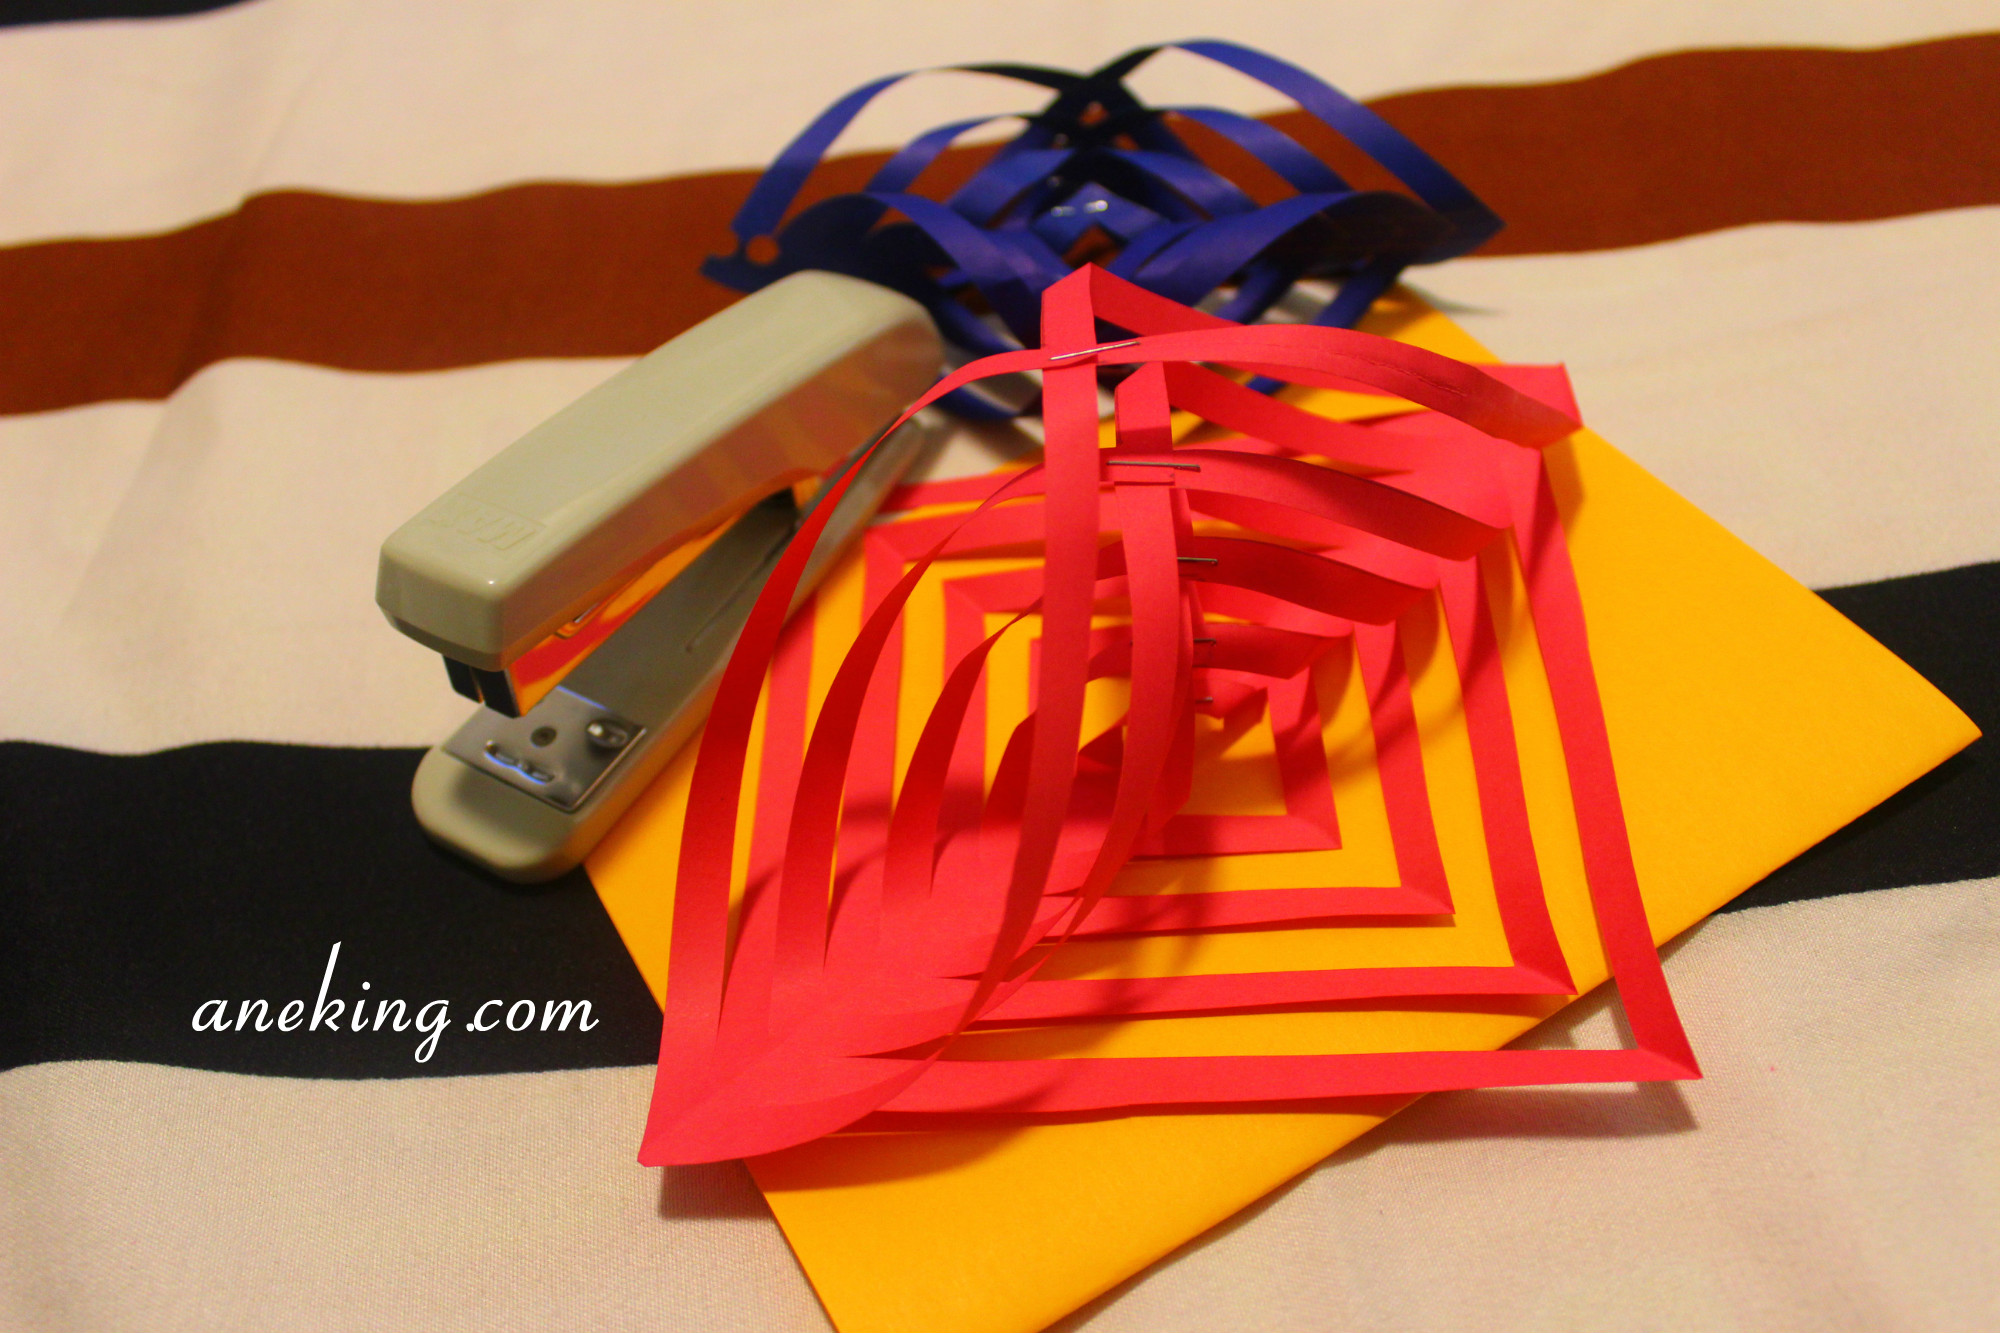
It’s always better to decorate ornaments that are made of your own hands. Here is an example of an DIY ornament that you can decorate in your homes especially this Christmas. All you have to prepare are the following – colored paper, scissors, pencil, ruler, stapler and string.
1. Cut your paper into a square.

2. Fold the squared paper in half to form a triangle.

3. Draw dots 2cm apart along the middles of the triangle and along the longest side of the triangle. Connect the dots after.
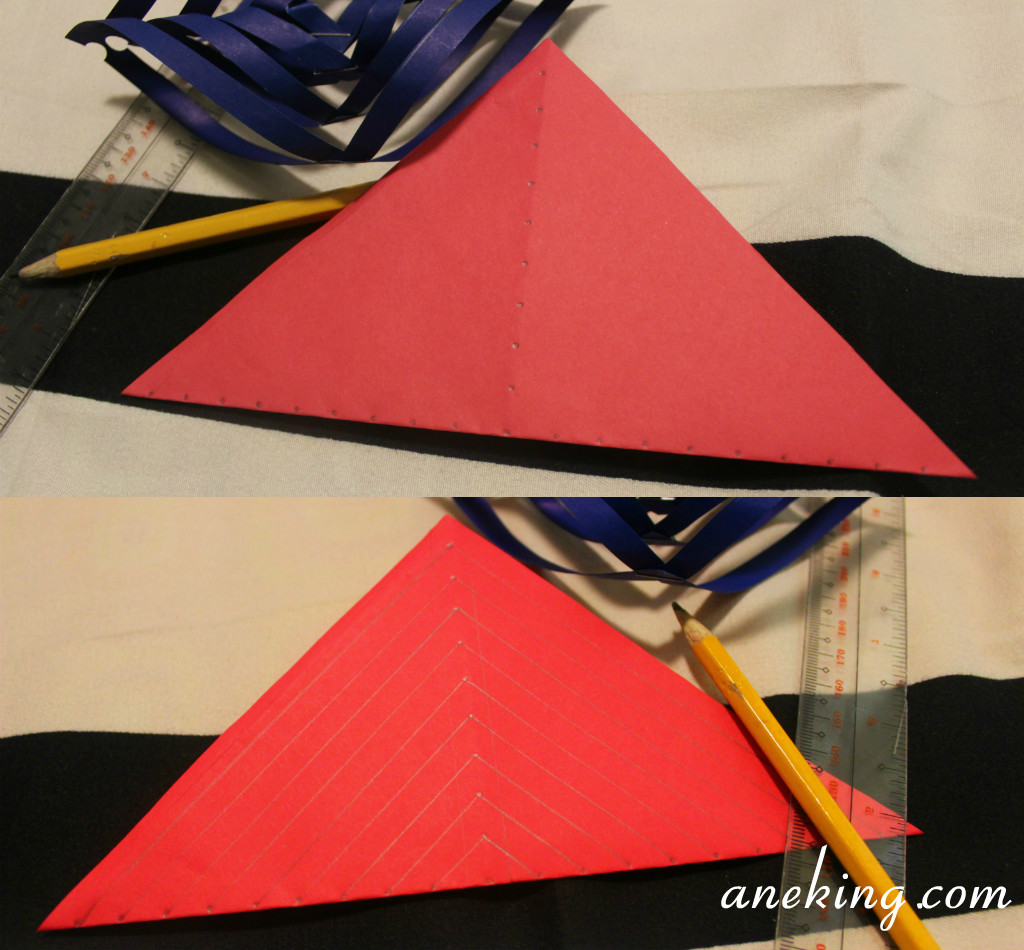
4. Cut along the lines starting from the folded part if the paper. Make sure to stop cutting 0.5cm before the dot in the middle.

5. Open up the paper into its original figure which is square or diamond.

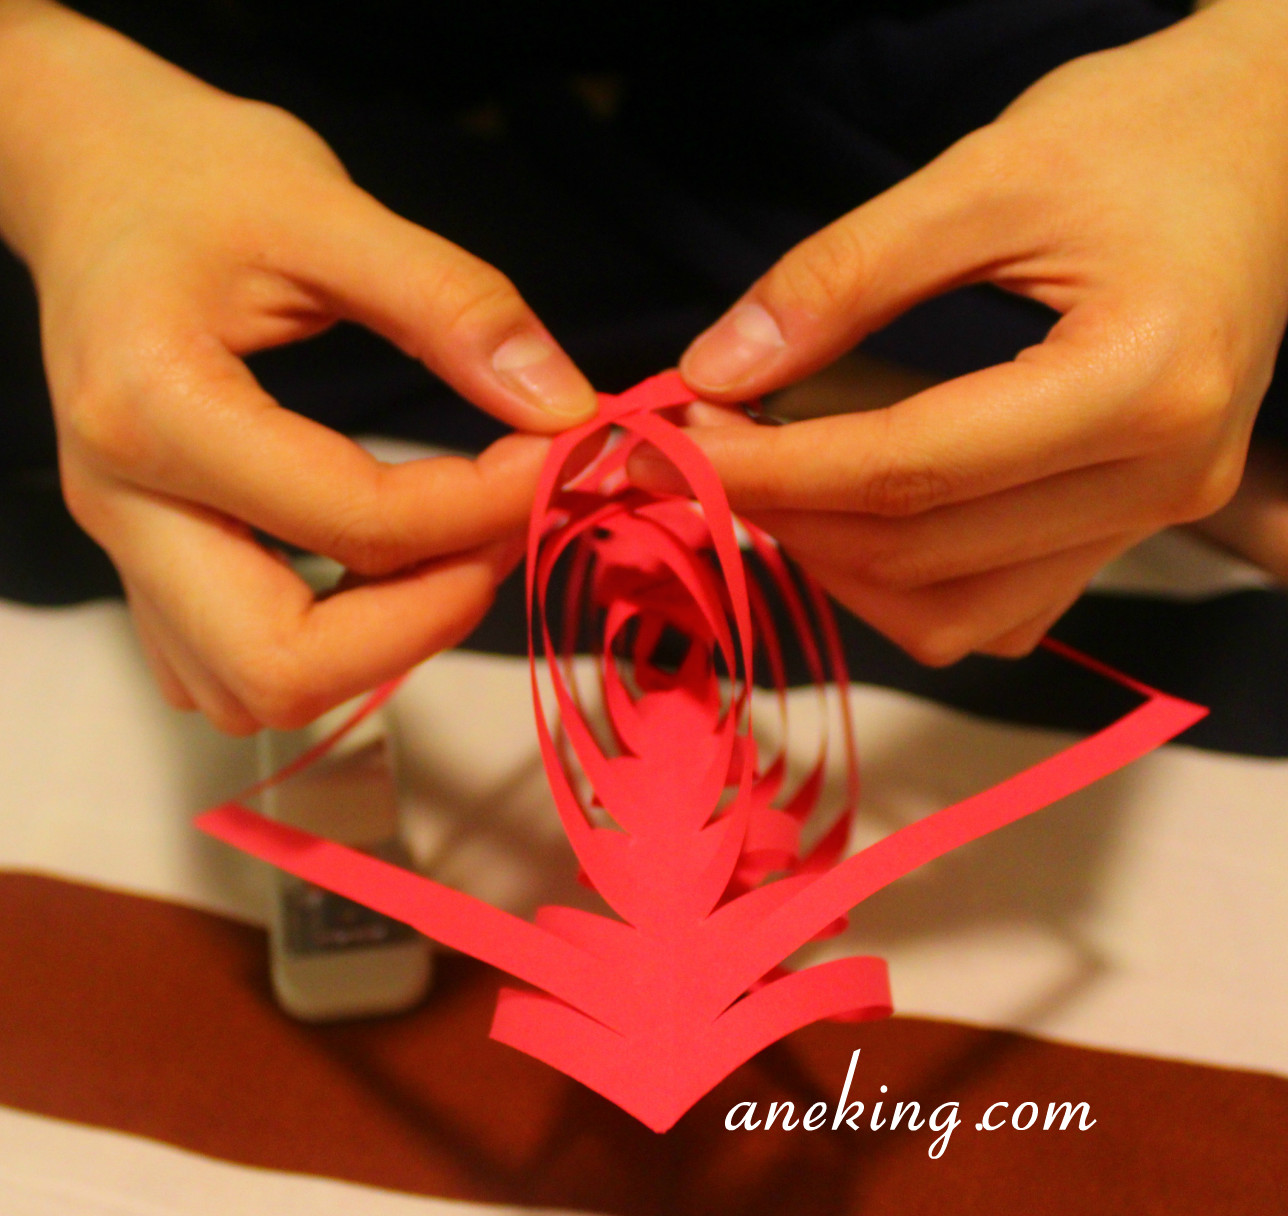
6. From the innermost of diamond, connect the opposite ends of the paper and staple. Skip the next line and do the same for the next. Repeat the process alternately.
7. When you’re done, flip the paper and do the same on the other side.
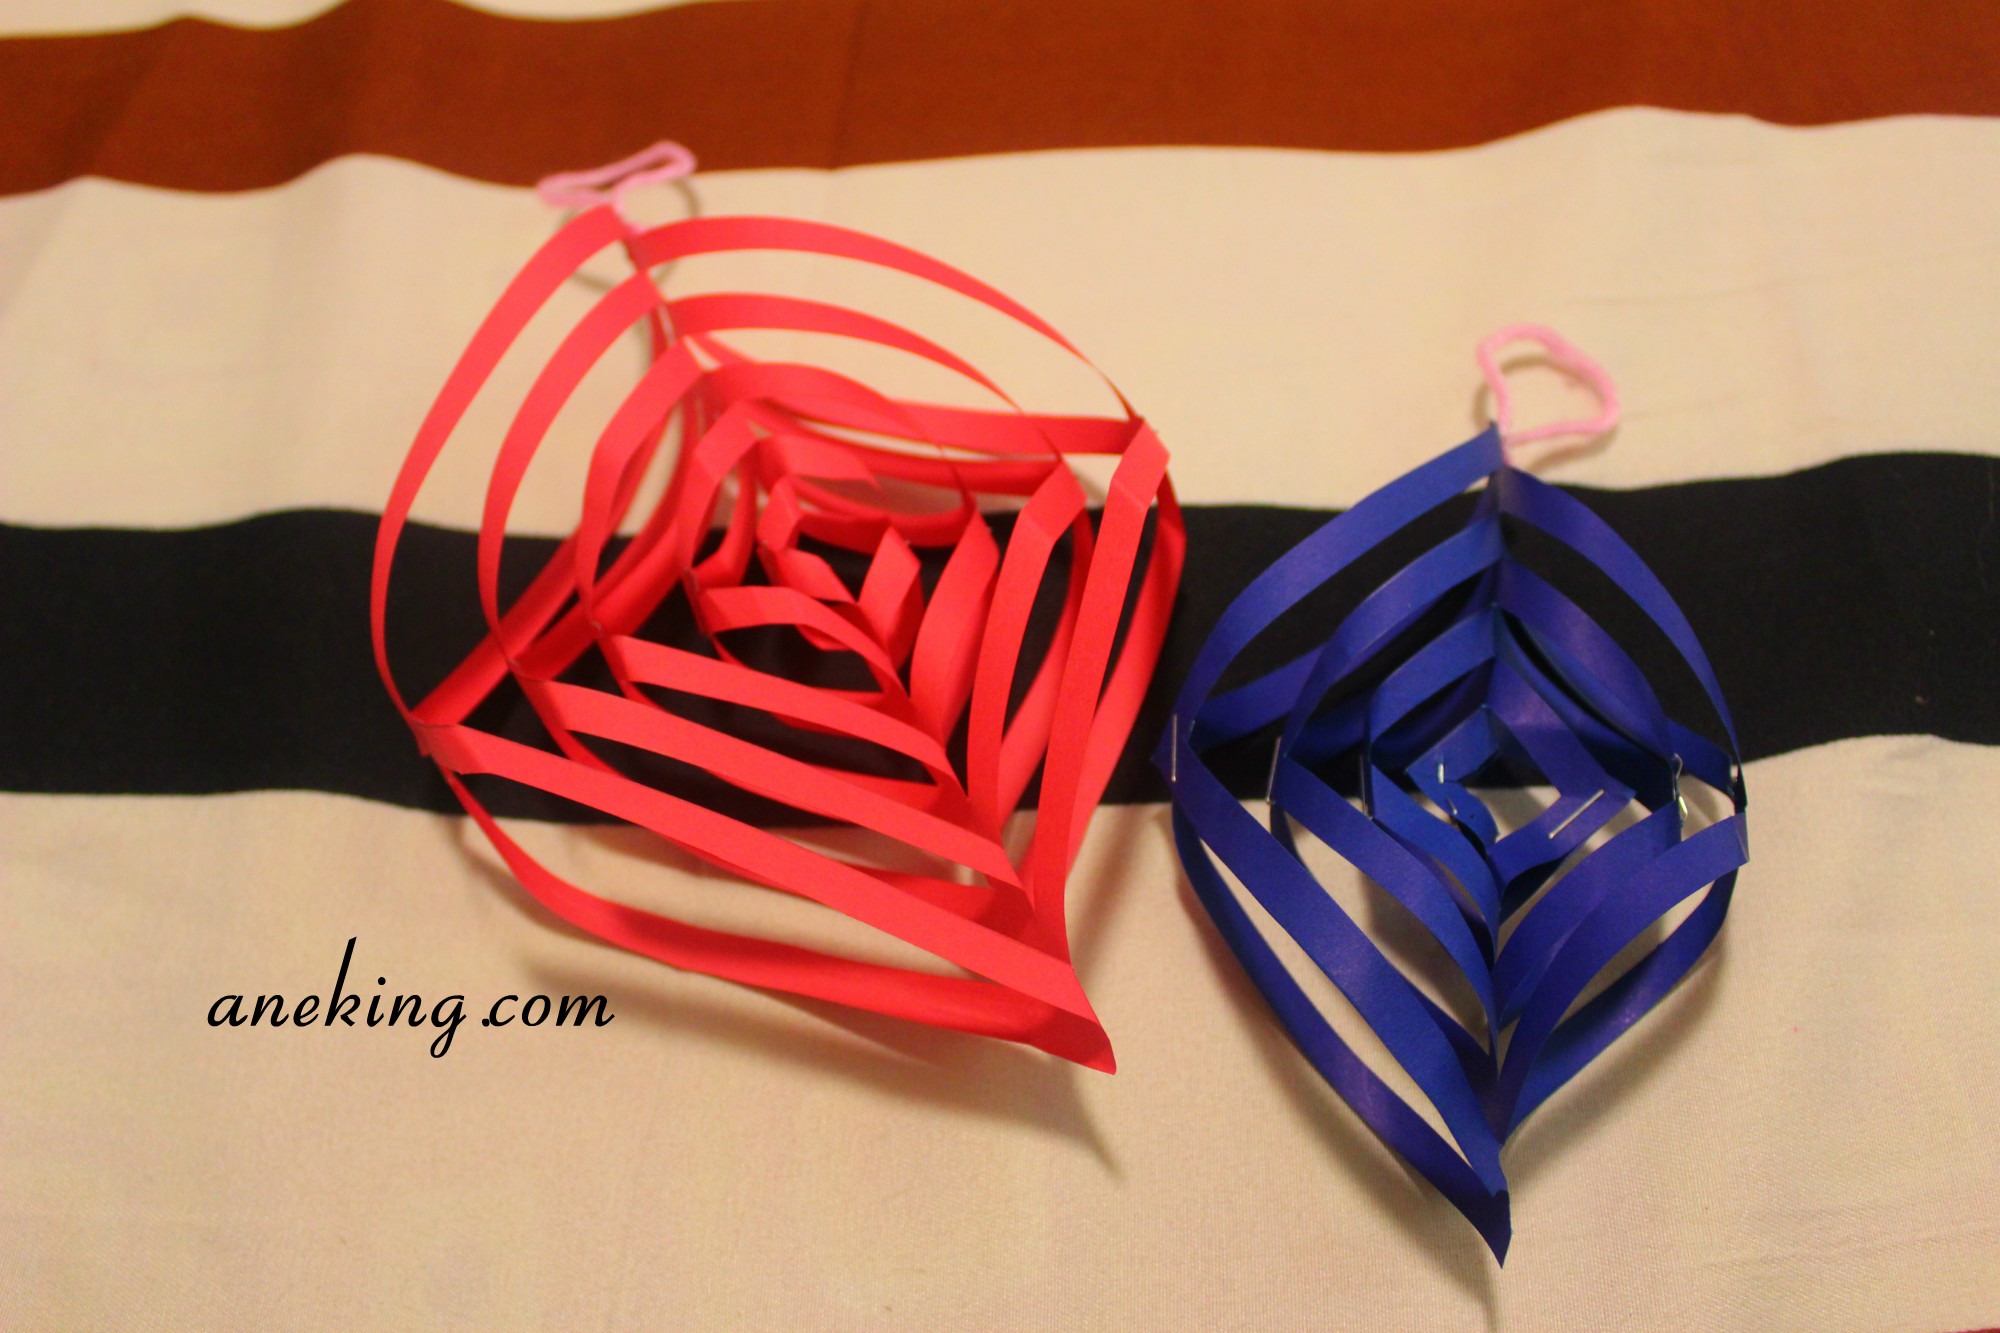
8. For you to hang it on your christmas trees or anywhere, attach a string or ribbon on its top.

9. The ornament is now ready to use as your christmas decoration. Merry Christmas, everyone!


effort 🙂
try it. =D